 Save
Save My niece called me three weeks before her graduation with a specific request: cupcakes with little caps on top. She didn't want anything complicated, just something that would make her friends smile at the party. I found myself standing in the baking aisle on a random Tuesday afternoon, suddenly remembering why I love these moments—when a simple dessert becomes part of someone's milestone. These cupcakes came together as naturally as that conversation, and they've become my go-to whenever someone needs to celebrate.
The first time I made these, I assembled the caps while sitting at the kitchen counter with my hands on autopilot, half-listening to a podcast. My mom walked in, picked one up, and just started laughing because the tassel was so perfectly cheerful and slightly crooked—it somehow made them more charming. That's when I realized these aren't about perfection; they're about capturing a feeling of achievement with your hands.
Ingredients
- All-purpose flour: The foundation that keeps these cupcakes tender without being dense, and I've learned that scooping directly from the bag packs it down, so spoon it in and level it off for better results.
- Granulated sugar and softened butter: Creaming these together for a full minute creates air pockets that make each cupcake light and fluffy, which is non-negotiable for that perfect texture.
- Eggs: Adding them one at a time rather than all at once helps them incorporate smoothly and prevents the batter from breaking or becoming greasy.
- Whole milk: This keeps the crumb moist without making it greasy, and room-temperature milk mixes in better than cold straight from the fridge.
- Baking powder and salt: The baking powder gives lift while salt deepens the vanilla flavor in a way people taste but can't quite name.
- Vanilla extract: Pure vanilla is worth the small splurge here because it's the unsung backbone of these cupcakes.
- Powdered sugar for frosting: Sifting it beforehand prevents lumpy frosting and saves you the frustration of beating air into clumps.
- Mini peanut butter cups or chocolate squares: These form the base of your graduation cap and create that satisfying visual anchor on top of each cupcake.
- Licorice or sour candy strips: The tassel material that brings playfulness to these toppers, and honestly, the slight tackiness of licorice holds better than you'd expect.
- Mini M&Ms or candy pearls: These become the button detail that ties the whole cap together and adds that final touch of personality.
Tired of Takeout? 🥡
Get 10 meals you can make faster than delivery arrives. Seriously.
One email. No spam. Unsubscribe anytime.
Instructions
- Prepare your oven and pan:
- Set your oven to 350°F and line your muffin tin with paper liners, pressing them gently into the cups so they don't shift when you pour batter.
- Cream the butter and sugar:
- Beat them together for about a minute until the mixture looks pale and fluffy—this is where the magic starts, as you're building the structure of your cupcakes. Once you add eggs, beat each one in fully before adding the next, then stir in your vanilla.
- Combine your dry ingredients:
- In a separate bowl, whisk flour, baking powder, and salt together so everything distributes evenly throughout the batter.
- Build the batter gently:
- Add half your dry mixture to the butter mixture and stir, then add the milk, then finish with the remaining dry ingredients. This alternating method keeps the batter smooth and prevents overmixing, which is the silent killer of tender cupcakes.
- Fill and bake:
- Divide batter evenly among liners—an ice cream scoop works perfectly—and bake for 18 to 20 minutes until a toothpick comes out clean. Let them cool in the pan for five minutes, then transfer to a cooling rack.
- Make your frosting:
- Beat softened butter until it's completely smooth, then gradually add your sifted powdered sugar while the mixer runs, so you don't create clouds of sugar. Add milk, vanilla, and salt, then beat until it's fluffy and spreadable—if it's too thick, add more milk one teaspoon at a time.
- Frost with confidence:
- Once cupcakes are completely cool, swirl frosting on top with a spoon or piping bag, making peaks and valleys where the frosting catches the light.
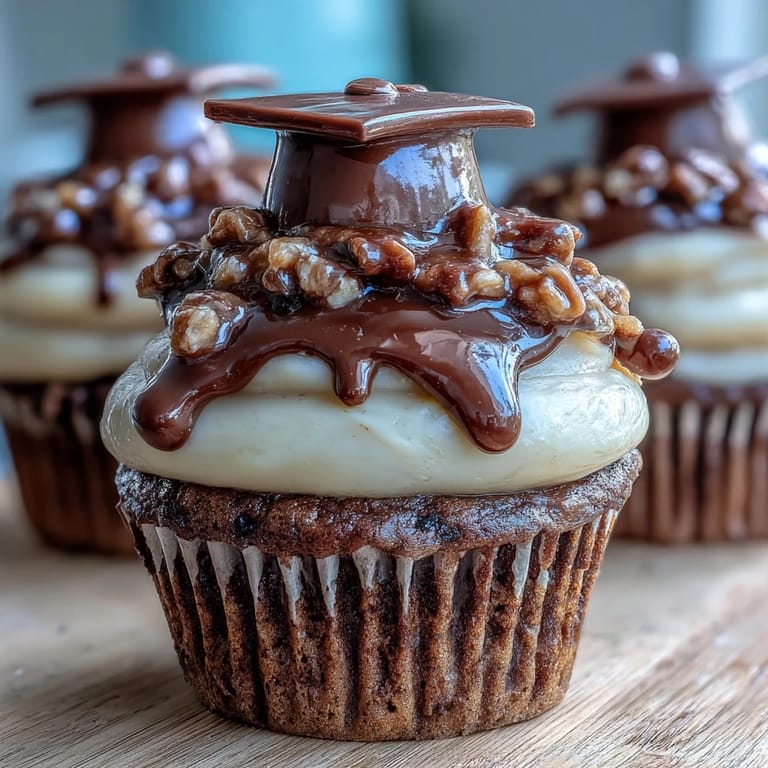
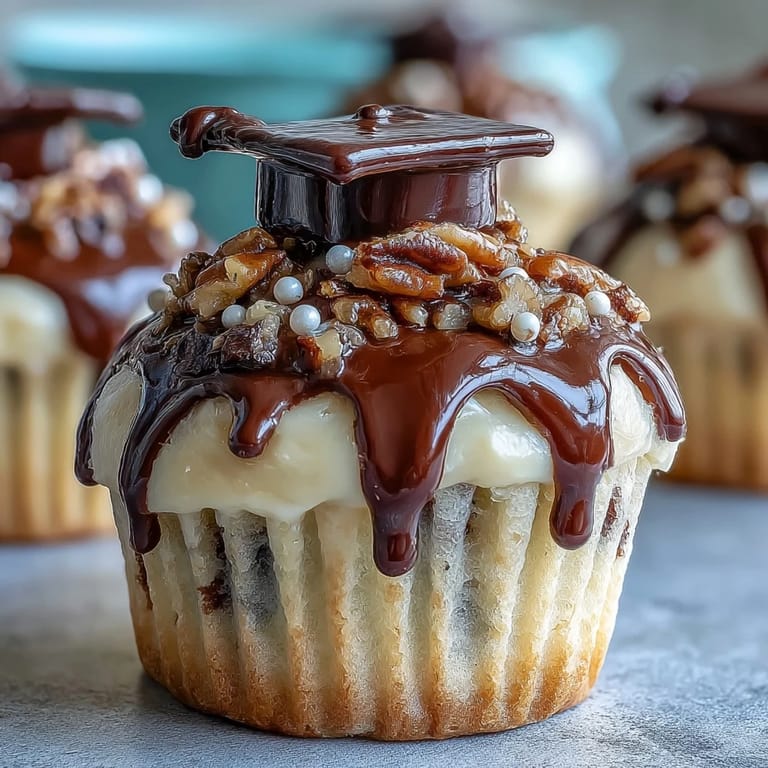
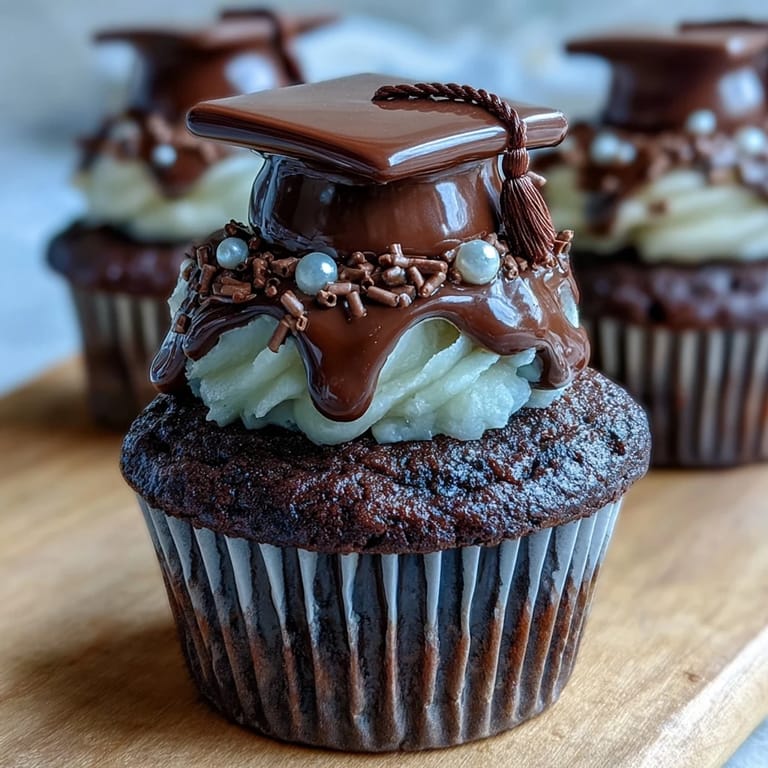
- Assemble the graduation caps:
- Place a chocolate square flat-side up, then dab melted chocolate or frosting on the center and press a peanut butter cup upside-down onto it. Attach your licorice tassel with another tiny dab of chocolate and place a mini M&M as the button on top—let everything set for a few minutes so it holds.
- Crown your cupcakes:
- Once the caps are set and stable, place one gently on top of each frosted cupcake, and watch them transform into celebration in edible form.
 Save
Save There's something about watching someone's face light up when they see their graduation cupcake that makes this recipe worth making again and again. These aren't fancy or complicated, but they're exactly what a celebration should be—thoughtful, a little bit fun, and entirely from the heart.
Making the Graduation Caps Feel Special
The caps are where you get to play, and I mean that genuinely. I've made them in the morning while coffee brewed, assembled them while sitting with a friend who was stress-talking about their own life, and even let my neighbor's kid help glue on the tassels. Each approach makes them look slightly different, and that's the whole point—they're meant to feel handmade and personal, not like they came from a factory. If you have thirty minutes of quiet kitchen time, use that peace to make them slowly. If you're assembling them during the actual party while people mill around, that's fine too, because the chaos of celebration actually suits these cupcakes.
Color and Personalization Ideas
The frosting is your canvas here, and I've tinted it school blue, forest green, maroon, and even a soft gold for a particularly fancy graduation. A few drops of gel food coloring mixed in while you beat the frosting transforms these from standard to personalized without any extra effort. You can also swap the cap color by using different chocolate squares—dark chocolate, milk chocolate, even white chocolate if your crowd prefers it. I once made half the cupcakes with red frosting and white caps for one school and blue frosting with gold caps for another, and honestly, having two color options on one dessert table felt like I'd somehow made this even more of a celebration.
Storage and Make-Ahead Wisdom
You can bake the cupcakes a full day ahead and frost them in the morning, which takes the pressure off day-of stress. The frosting keeps them moist, and they stay fresh at room temperature for two days easily. If you're making these for a party more than a day away, bake and freeze the unfrosted cupcakes in an airtight container for up to a week, then thaw and frost them when you're ready. The caps themselves can be assembled hours ahead and kept in a cool spot away from direct sunlight so the chocolate doesn't soften. This flexibility is honestly why I keep coming back to this recipe—it bends to your schedule instead of fighting it.
- Keep frosted cupcakes in an airtight container at room temperature, and they'll stay fresh for two days.
- Assemble caps a few hours before serving so the chocolate stays set and stable on top of the frosting.
- If your kitchen is warm, refrigerate the frosted cupcakes for 30 minutes before adding caps so they hold their shape better.
 Save
Save These cupcakes are proof that celebration doesn't need to be complicated. Make them, share them, and watch the moment they become part of someone's memory of their own achievement.
Recipe FAQs
- → How do I make the cap toppers?
Assemble by placing a chocolate square flat, attaching an upside-down mini peanut butter cup with melted chocolate or frosting, then adding a licorice tassel and a mini candy button on top.
- → Can I substitute ingredients for allergies?
Yes, use chocolate square candies instead of peanut butter cups for nut-free alternatives and always check candy labels for allergens.
- → What is the best way to store these cupcakes?
Store them in an airtight container at room temperature for up to 2 days to keep them fresh and moist.
- → Can I add color to the frosting?
Yes, incorporate food coloring into the buttercream to match school colors or personalize the decoration scheme.
- → What baking time is recommended?
Bake the cupcakes for 18 to 20 minutes at 350°F (175°C) until a toothpick inserted comes out clean.