 Save
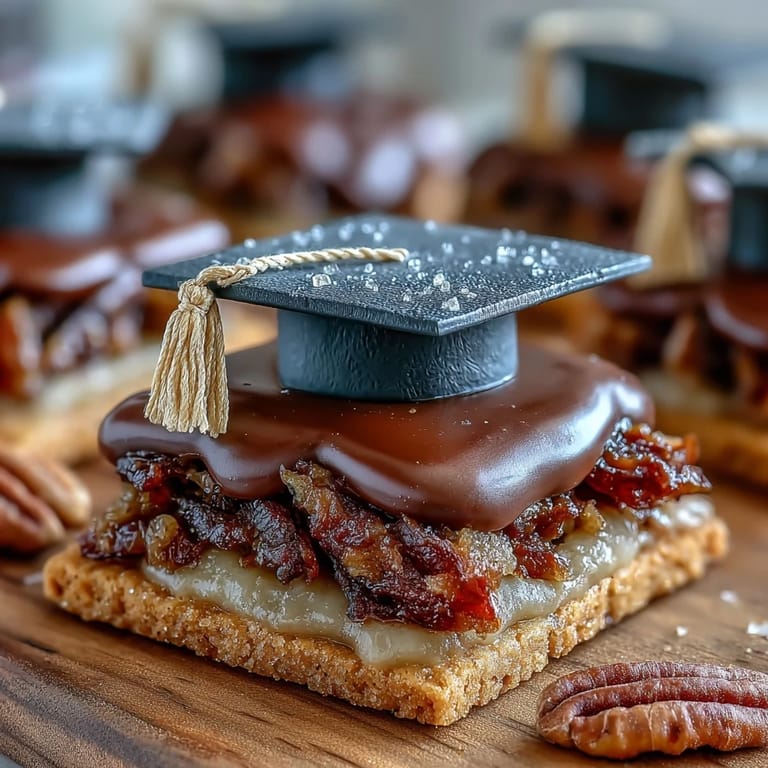
Save My sister called me three weeks before her daughter's graduation, voice tight with that particular stress of someone juggling a thousand details. She needed something special for the celebration—cookies, she said, but not just any cookies. I found myself in the kitchen on a Tuesday evening, butter softening on the counter, thinking about how a simple sugar cookie could become a tiny edible diploma. That's when I realized these mortarboard cookies weren't really about impressing people with technique; they were about marking a moment that mattered.
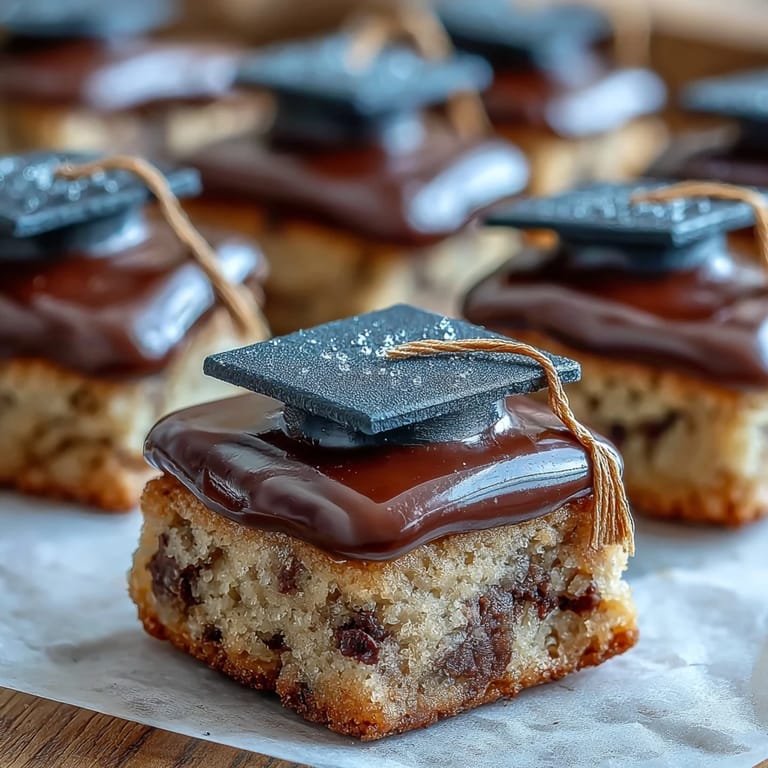
I showed up to that graduation party with a box of two dozen cookies, and watching my niece's face when she saw them arranged on a table—that little moment of recognition, that these were made specifically for her—reminded me why we bother decorating food at all. One of her friends grabbed three cookies before I'd even put down the box, and by the end of the night, there were exactly two left, one of which I'm fairly certain her mom was saving as a keepsake.
Ingredients
- All-purpose flour: The backbone of your cookies, and I've learned that measuring it by weight (315 g) instead of scooping keeps them consistent from batch to batch.
- Baking powder: Just a whisper of it keeps the cookies tender rather than cake-like, but don't skip it thinking less is more.
- Salt: This isn't filler—it's what makes the butter and sugar taste like themselves instead of one-dimensional sweetness.
- Unsalted butter, softened: Softened means it actually creams with the sugar; cold butter will fight you and waste your time.
- Granulated sugar: The sweetness that supports the fondant without competing with it.
- Egg and vanilla extract: These bind everything together and add that cookie-box aroma people recognize immediately.
- Black fondant: The star decoration, and honestly, store-bought is perfectly respectable here—making fondant from scratch is a whole separate endeavor.
- Yellow fondant: For the tassel detail that transforms a simple hat into something intentional.
- Powdered sugar and milk: Your edible glue, the thing that holds this whole edible architecture together.
Tired of Takeout? 🥡
Get 10 meals you can make faster than delivery arrives. Seriously.
One email. No spam. Unsubscribe anytime.
Instructions
- Get your oven ready and set up your workspace:
- Preheat to 350°F and line two baking sheets with parchment paper so you're not scrambling when the dough is ready. This is the five-minute investment that prevents burnt bottoms.
- Mix your dry ingredients:
- Whisk together flour, baking powder, and salt in a medium bowl, which aerates the flour and distributes the leavening evenly. This small step prevents dense pockets later.
- Cream butter and sugar until fluffy:
- Beat them together for 2–3 minutes until the mixture looks pale and clouds form when you lift the beaters. You're incorporating air, which makes the cookies tender.
- Add egg and vanilla:
- Mix just until you don't see streaks anymore; this is not a race, and overbeating develops gluten you don't want in a delicate cookie.
- Bring wet and dry ingredients together:
- Add the flour mixture gradually while mixing on low speed, stopping as soon as you can't see dry flour. The moment everything comes together, you're done—keep mixing and your cookies will be tough.
- Roll and cut your cookies:
- On a lightly floured surface, roll dough to 1/4-inch thickness and cut into 2 1/2-inch rounds or squares, which is the perfect size for your mortarboard decoration. Reflour your work surface as needed so nothing sticks.
- Bake until barely golden:
- Slide cookies into the oven for 10–12 minutes; they should look slightly underdone when you pull them out, since they keep cooking as they cool. Golden edges and a soft center is exactly what you want.
- Cool completely before decorating:
- This is non-negotiable because fondant on a warm cookie will melt and slide everywhere. Use a wire rack so air circulates underneath.
- Prepare your fondant pieces:
- While cookies cool, roll black fondant thin and cut twenty-four 1 1/4-inch squares for the mortarboard tops, then roll tiny cylinders for the bases. Dust everything lightly with cornstarch so nothing sticks to itself.
- Shape yellow tassels:
- Roll thin ropes of yellow fondant and cut into 1-inch pieces; you can leave them straight or twist them slightly for character. These don't need to be perfect—they just need to read as tassels.
- Make your icing:
- Mix powdered sugar, milk, and vanilla until it's smooth and pipeable but not soupy. If it's too thick, add milk one teaspoon at a time; too thin and your decorations will slide right off.
- Assemble each cookie:
- Dot icing in the center of each cooled cookie, press a black fondant square on top, tuck a fondant cylinder underneath it, and attach a yellow tassel to one corner with another tiny dab of icing. Think of it like constructing a tiny edible building, piece by piece.
- Let decorations set:
- Give everything 20–30 minutes to dry and firm up before you stack or package them, which prevents smudging and sliding.
 Save
Save Weeks after the party, my sister texted me a photo of my niece in her cap and gown, holding one of the cookies next to her diploma, laughing at the comparison. That's when I understood these cookies weren't decoration—they were a small, edible way of saying congratulations to someone you love.
Why These Cookies Hit Different
There's something about a sugar cookie that feels like celebration even before you decorate it. The vanilla comes through, the butter makes everything taste a little bit special, and the texture lands that exact middle ground between crispy and chewy. Add a mortarboard on top and suddenly you're not just serving dessert—you're serving a memory of the day itself.
Making the Fondant Details Feel Effortless
The fondant work is honestly the part that intimidates people, but I've found that treating it like craft time rather than precision baking takes all the pressure off. Your mortarboards don't need to be architectural marvels; they just need to suggest the real thing. A slightly tilted hat is charming, not a failure.
Storage and Serving
These cookies keep beautifully in an airtight container for up to five days, which means you can bake them ahead of time and spend the day before the party on actual celebrating instead of last-minute decorating. If you're shipping them, wrap each one individually in parchment and pack them snugly so the mortarboards don't shift around.
- Color the fondant to match school colors, and nobody will know you didn't make it from scratch.
- A shortcut that nobody needs to know about: buy pre-made sugar cookie dough and focus all your energy on the fondant decorations, which is where the magic happens anyway.
- If fondant isn't your thing, you could pipe the mortarboard design in royal icing instead, which gives you the same visual impact with less fussiness.
 Save
Save These cookies have become my go-to for marking milestones—graduations, certainly, but also promotions, new jobs, and any moment that deserves a little edible acknowledgment. They're proof that simple ingredients in the right hands become something worth remembering.
Recipe FAQs
- → What type of flour is used in the cookies?
All-purpose flour is used to create a tender and balanced texture for the cookies.
- → How is the fondant shaped for decoration?
Fondant is rolled thin and cut into small squares for mortarboard tops, cylinders for bases, and thin ropes for tassels.
- → Can the cookies be prepared ahead of time?
Yes, cookies can be baked and decorated in advance, then stored in an airtight container for up to five days.
- → What’s the best way to attach fondant decorations?
Use a simple icing made from powdered sugar, milk, and vanilla to secure fondant pieces onto the cooled cookies.
- → Are there alternatives for dietary restrictions?
Substitutions like gluten-free flour, dairy-free butter, or egg replacers can be used; however, fondant ingredients should be checked carefully.