 Save
Save I discovered this cake while visiting my grandmother's sewing room on a rainy afternoon. Surrounded by fabric scraps in every color imaginable, she mentioned how much she wished her desserts could be as beautiful and purposeful as her quilts. That simple wish sparked something in me, and I spent the next week experimenting until I created a cake that captures that same patchwork magic—each colored square a deliberate choice, layered and woven together like the quilts she'd spent her life perfecting.
I made this cake for my friend Sarah's housewarming, nervous that five separate batter batches would be too much to handle. But as I worked through each color, something meditative happened. By the time I was arranging those little squares on the tray, I felt like I was telling a story with my hands—creating something that was both technically challenging and deeply personal. When she cut into it at her party, everyone gasped. That moment made all the planning worthwhile.
Ingredients
- All-purpose flour (350 g): The foundation of your sponge. It needs to be measured correctly—I learned this the hard way by spooning it directly from the bag, which packed it down and made my first attempt dense. Spoon and level with a knife for accuracy.
- Granulated sugar (300 g): This sweetens the cake and creams with butter to create that light, fluffy crumb. Don't skip the creaming step; it's where the magic happens.
- Baking powder (2½ tsp): Your rise agent. Make sure it's fresh—old baking powder won't give you the lift you need for those tender layers.
- Salt (½ tsp): A pinch that balances sweetness and enhances vanilla. Never omit it, even though it seems insignificant.
- Unsalted butter, softened (250 g for cake, 350 g for frosting): Softened, not melted. Room temperature butter creams evenly and creates that signature fluffy texture. Have it sitting out for at least an hour before you start.
- Large eggs (4): Room temperature eggs incorporate more smoothly into the batter. Cold eggs can cause the mixture to break and become grainy.
- Whole milk (250 ml): This keeps the crumb tender and moist. I use whole milk because it adds richness that lower-fat versions don't quite achieve.
- Vanilla extract (2 tsp for cake, 2 tsp for frosting): The soul of this cake. Quality vanilla makes a noticeable difference. Pure extract, not imitation, transforms the flavor.
- Food coloring gels (red, yellow, green, blue, purple): Gel colors are essential here. Liquid food coloring thins your batter and muddies the colors. Gel coloring gives you vibrant hues without compromising texture.
- Powdered sugar (500 g): For the buttercream frosting. Sift it if it's lumpy; small lumps don't dissolve and create grittiness.
Tired of Takeout? 🥡
Get 10 meals you can make faster than delivery arrives. Seriously.
One email. No spam. Unsubscribe anytime.
Instructions
- Prepare Your Pans and Preheat:
- Set your oven to 180°C (350°F) about 15 minutes before you start. While it heats, grease and line five 20 x 20 cm square baking pans with parchment paper. The parchment is crucial—it keeps edges from browning too much and makes turning out the cakes easier. If you only have two pans, don't worry; you can bake in batches, keeping the finished cakes on cooling racks while you bake the others.
- Cream Butter and Sugar:
- In a large mixing bowl, beat softened butter and granulated sugar together for about 3–4 minutes. You're looking for the mixture to transform from pale yellow to nearly white, becoming light and fluffy. This process incorporates air into the batter, which becomes the structure of your crumb. Run your finger along the paddle occasionally—it should feel airy and almost mousse-like.
- Incorporate Eggs One at a Time:
- Add eggs individually, beating well after each addition. If your mixture looks slightly separated or curdled, don't panic. Add a tablespoon of your flour mixture to bring it back together, then continue. This temperamental moment is temporary and won't affect the final cake.
- Add Vanilla Extract:
- Stir in vanilla extract until fully combined. The aroma alone will make you want to dive into the bowl.
- Combine Dry Ingredients:
- In a separate bowl, whisk together flour, baking powder, and salt. Whisking incorporates air and distributes the leavening agents evenly, preventing dense pockets in your finished cake.
- Alternate Wet and Dry Ingredients:
- Here's where patience pays off. Add about one-third of the flour mixture to your butter mixture, folding gently until just combined. Then add about half the milk, folding again. Repeat: another third of flour, remaining milk, then the final flour. Stop mixing as soon as you see no white streaks. Overmixing develops gluten and creates a tough crumb—the enemy of a tender cake.
- Divide and Color Your Batters:
- Divide your batter evenly into five bowls. Using gel food coloring, add a few drops to each bowl, stirring until the color is uniform and vibrant. The beauty of this cake comes from these colors, so don't be shy. Start with a little less coloring than you think you need; you can always add more, but you can't take it out.
- Pour and Bake:
- Pour each colored batter into its prepared pan, spreading evenly with a spatula. Place all pans in your preheated oven (or as many as fit). Bake for 20–25 minutes, until a toothpick inserted in the center comes out clean or with just a few moist crumbs. The cakes should spring back when lightly touched.
- Cool and Release:
- Let the cakes cool in their pans for 10 minutes—this allows the structure to set slightly and makes turning out easier. Then, run a thin knife around the edges and turn them out onto cooling racks. Let them cool completely before the next step. This patience step is non-negotiable; warm cake crumbles.
- Prepare Your Buttercream:
- While cakes cool, beat softened butter until creamy and pale, about 2 minutes. Gradually add powdered sugar a handful at a time, beating between additions. Once all sugar is in, add vanilla extract and a pinch of salt. Beat on medium speed for 3–4 minutes until fluffy and light. If it's too stiff, add milk one tablespoon at a time until you reach a spreadable consistency.
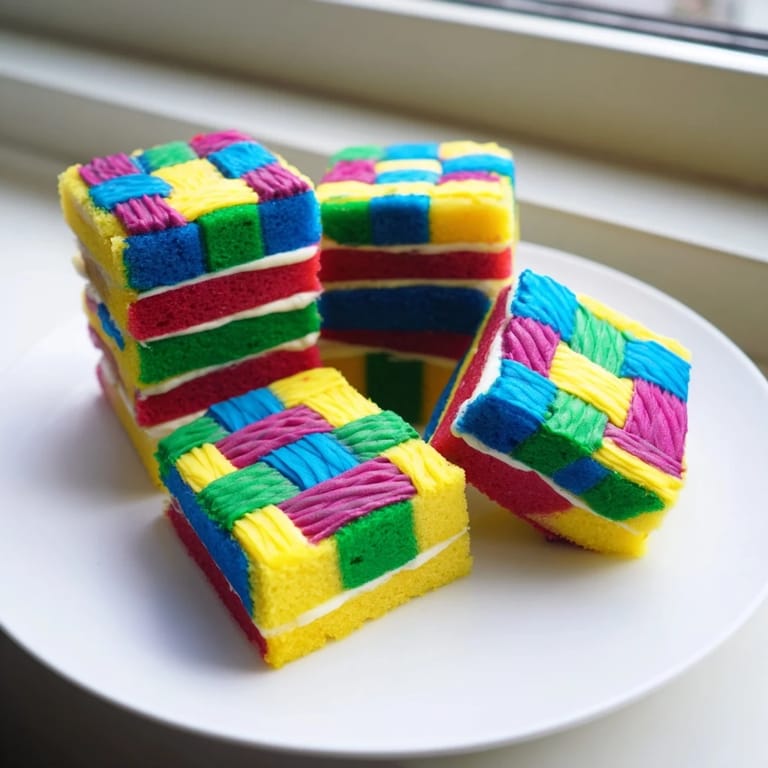
- Slice Into Squares:
- Once cooled completely, trim the edges of each colored cake with a serrated knife for clean edges. Then slice each sponge into uniform 3 x 3 cm squares. You'll have roughly 25–30 squares per color. This is meditative work—take your time and use a fresh, serrated knife for clean cuts.
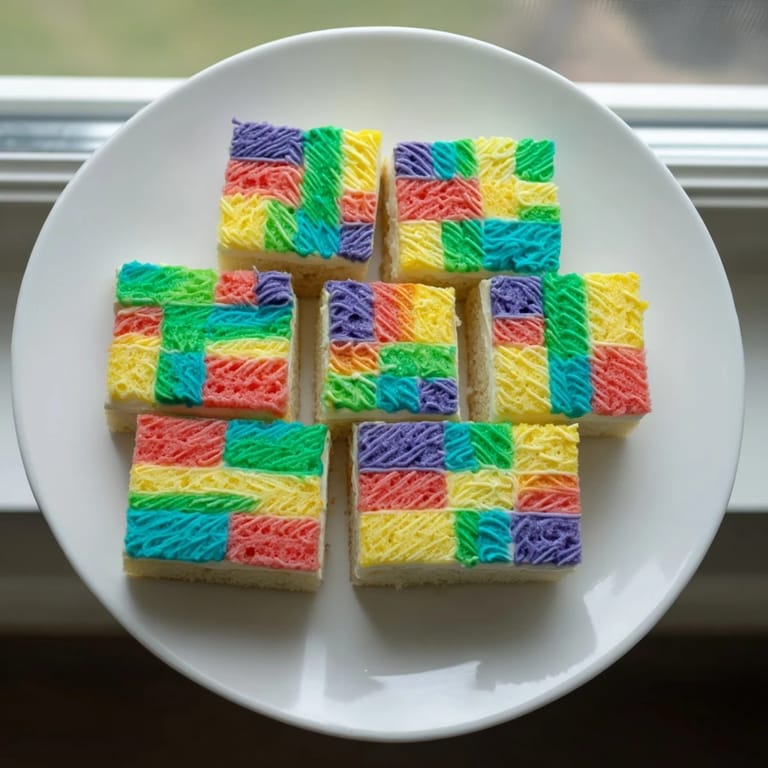
- Assemble the Patchwork:
- On a large, level serving tray, start arranging your colored squares like you're creating a quilt. Alternate colors in a pattern that feels balanced to you. As you place each square, add a thin layer of buttercream between them—just enough to hold them together without squishing out the sides. Build up in layers, continuing to alternate colors as you go higher. This creates depth and ensures the entire structure is held together by buttercream.
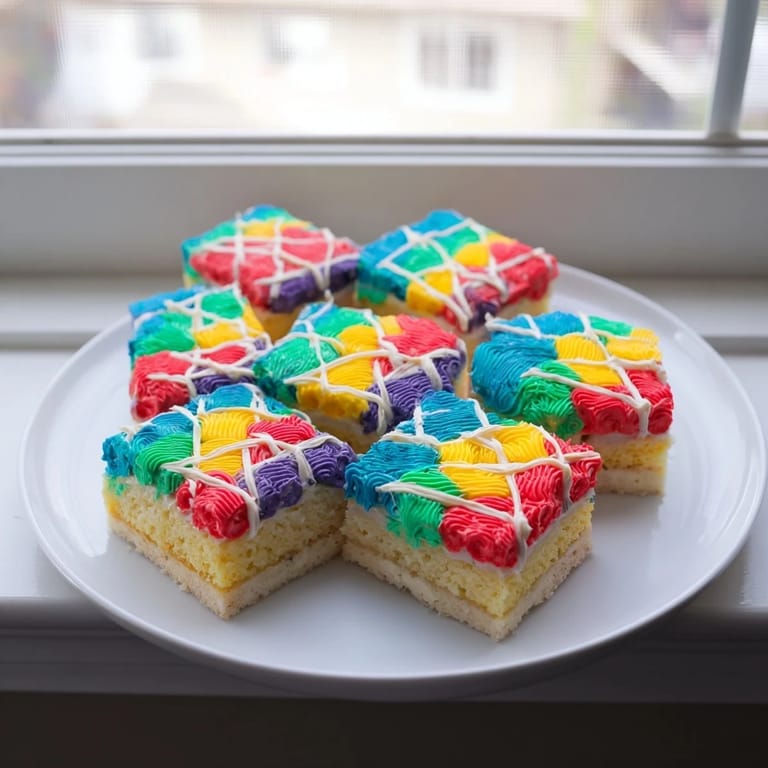
- Frost and Chill:
- Once assembled, apply a thin layer of buttercream over the entire cake, smoothing it as evenly as possible with an offset spatula. If you're feeling artistic, pipe buttercream lines with a piping bag to enhance the patchwork effect, creating a grid that makes the individual squares stand out. Chill the finished cake for at least 30 minutes before slicing. This sets the buttercream and makes cutting cleaner.
 Save
Save My sister came home from college for a weekend visit, and I made this cake specially for her. When she walked into the kitchen and saw that riot of colors—the patchwork pattern catching the afternoon light—she actually cried. She said it looked like something that belonged in an art gallery, not on our kitchen counter. That's when I understood that this cake is more than dessert; it's a conversation, a celebration, a edible love letter to the people you're feeding.
Why This Cake Works as a Showstopper
The secret to this cake's visual impact is the contrast between the vibrant colors and the simplicity of the design. There's nothing fussy about it—just clean squares and bold colors arranged with intention. This makes it feel both modern and timeless, sophisticated yet approachable. The patchwork pattern is forgiving too; slight imperfections in your squares actually add to the handmade charm. When you present this cake, people see the effort and creativity, not the technical challenges you overcame.
Flavor and Texture Considerations
The vanilla sponge base is deliberately mild so it doesn't compete with the buttercream or overwhelm the senses. But this simplicity is a strength. If you want to add complexity, consider folding citrus zest into the batter or using almond extract instead of vanilla. These additions elevate the flavor without changing the structure. The tender crumb comes from the ratio of fat to flour and the proper creaming technique. The buttercream frosting is rich and stable, essential for holding all those squares together while keeping each bite light. This is why unsalted butter matters—salted butter has a different water content and will throw off your buttercream's consistency.
Making It Your Own
While the basic technique is straightforward, this cake invites personalization. You can change the color palette entirely—pastels for spring, jewel tones for winter, monochromatic for elegance. You can alter the square size to create a finer or bolder pattern. You can add flavored extracts, zest, or even a thin layer of jam between squares for extra flavor. The structure remains the same; only your creative choices change. This flexibility is what makes it feel both like a recipe and like your own creation.
- Consider using 6 colors instead of 5 for an even more complex patchwork effect, or stick with 3 colors for a more minimalist look
- If you don't have 5 pans, baking in batches takes longer but works perfectly—just keep finished cakes on racks while others bake
- Fresh berries or lightly sweetened whipped cream on the side complements the buttercream beautifully without overwhelming the cake itself
 Save
Save This cake is a testament to the joy that comes from making something beautiful with your hands. Every slice is a small piece of intentional design, meant to bring pleasure and wonder to the table.
Recipe FAQs
- → How do I achieve the vibrant colors in the sponge?
Use gel food coloring gels for intense hues without thinning the batter, tinting each portion separately before baking.
- → Can I prepare this cake in advance?
Yes, baking and assembling the colorful sponge squares ahead of time allows flavors to meld. Chill before serving.
- → What is the best way to cut uniform squares?
Trim edges for evenness, then slice into consistent 3 x 3 cm squares using a serrated knife for clean cuts.
- → How should the layers be assembled?
Arrange squares in an alternating color pattern and use a thin layer of buttercream as a glue between pieces for a patchwork effect.
- → Are there alternatives for dietary restrictions?
Substitute with gluten-free flour blends for gluten-free versions and add citrus zest or almond extract to enhance flavor.